How to Do Qmail to Exchange Server Migration in Five Simple Steps ? – Your Pocket Guide


Abstract:- Want to know how to do Qmail to Exchange migration? Do you have emails in Qmail mail server and intend to transfer data from Qmail to Microsoft Exchange? If your answer is yes, then relax and stay here.
From the time of Qmail’s introduction since June 15, 1998, users are enjoying the simple configuration of Qmail service. Qmail has become a more safe replacement of the very well-known Sendmail program which gets affected by the security bugs. So, thereby Daniel J. Bernstein designed and wrote Qmail as a safe alternative. In contrast to Qmail, if we talk about Microsoft Exchange then it’s also a popular mail server whose first version Exchange Server 4.0 started in March, 1996.
A while ago, our client from Chicago got in touch with our technical support team and asked this query:
Hi, I am Amelia my Qmail mail server is not working properly from past one week. I can’t wait now and lose all my important data. So, I have decided to migrate Qmail emails to Exchange 2019. I don’t know how to do Qmail to Exchange migration manually or through automated process. Since I have heard about the accomplishments of your software, I am sure you will certainly give me some positive feedback regarding my problem. Please suggest me a reliable and efficient Qmail to Exchange migrator. I will be very thankful to you!
Acknowledging the above query and lot more problems asked by our customers, we have decided to come up with a step-by-step solution using RecoveryTools IMAP Backup tool to transfer Qmail to Microsoft Exchange server.
But before that read the major benefits which you will get after migrating Qmail to Exchange online.

What Benefits Can You Enjoy After Qmail to Exchange Migration ?
- MS Exchange protects your crucial information and it informs users of internal compliance policies.
- Gives you facility to keep all data safely at a single place with Exchange archiving, huge mailboxes and retention policies.
- Quickly destroys email threats before they reach your networks.
- Provides users an interactive, touch-enabled inbox experience on just about any device.
How to Migrate Qmail to Exchange Server Directly ?
Firstly, download and launch the Qmail to Exchange migration utility on any Windows machine.
Please Note:- This is a trial version of software and permits to convert first few Qmail data items to Exchange server. To eliminate this limitation, please switch to the pro edition.
Now, after launching the software on your computer, you can see the following picture as given below.
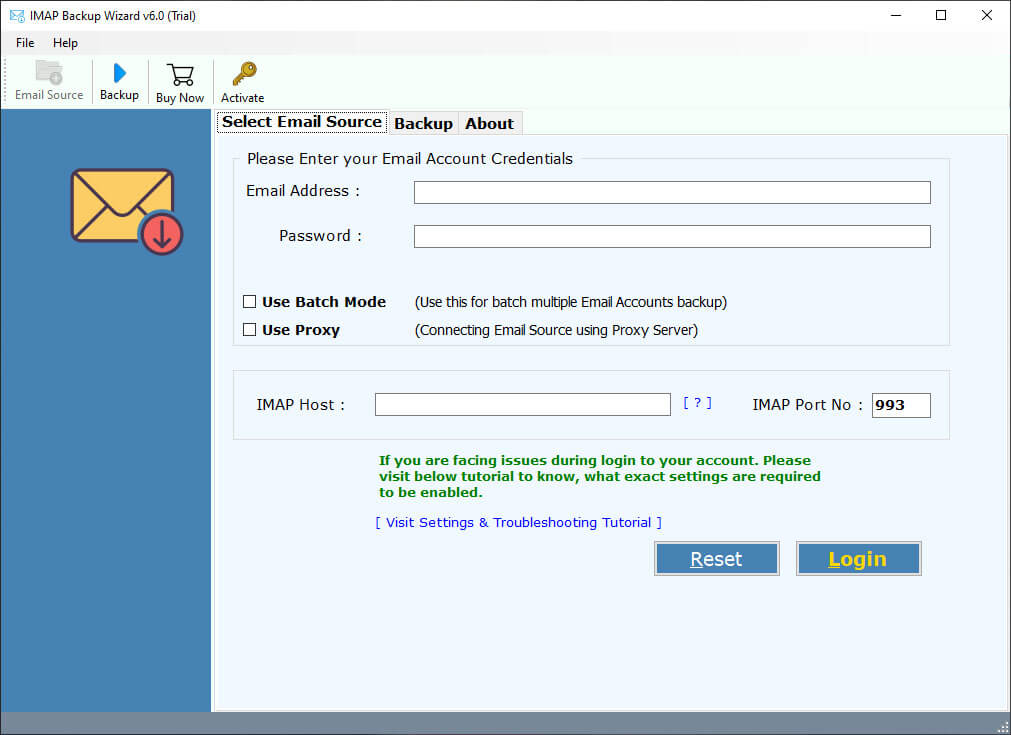
Here at this stage, you need to enter the Qmail server details such as IMAP Server name, Port No., User Name, Password. Along with this, hit on login button to start the process to transfer Qmail to Microsoft Exchange server.

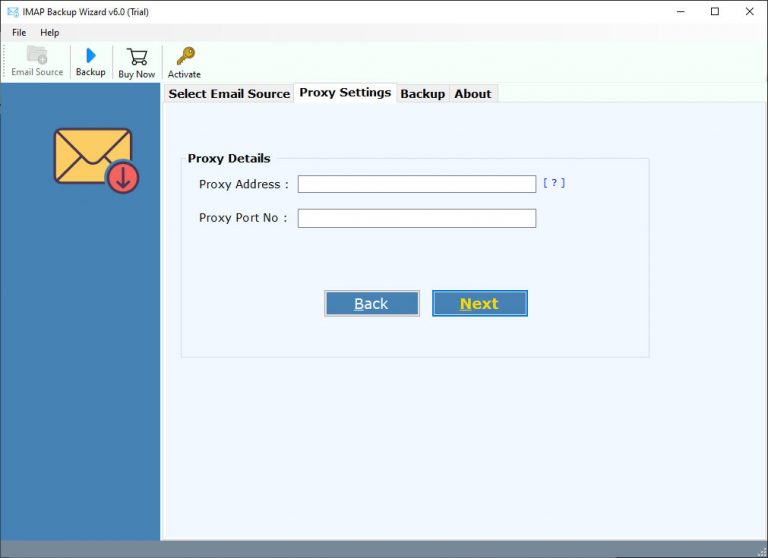
You can use the Proxy Server for connecting your IMAP server with different locations. So, for this, enter the Proxy address and Proxy Port No.
After this, the tool will automatically loads all email folders from Qmail to the software panel. Just enable the desired emails which you wish to migrate from Qmail server to Exchange online.
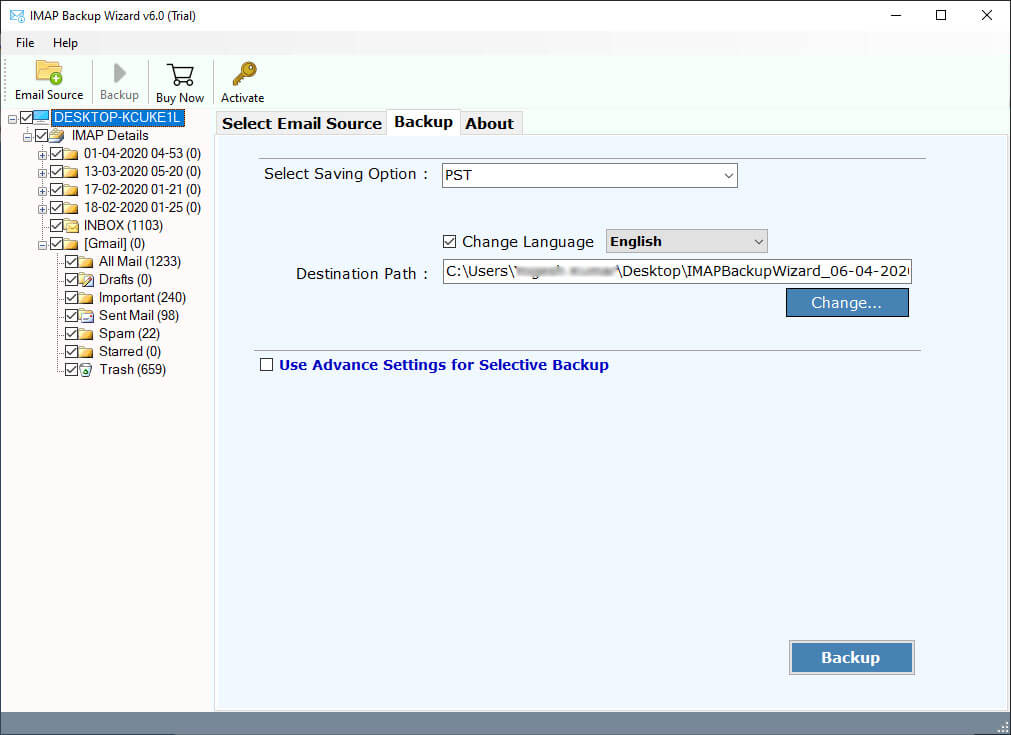
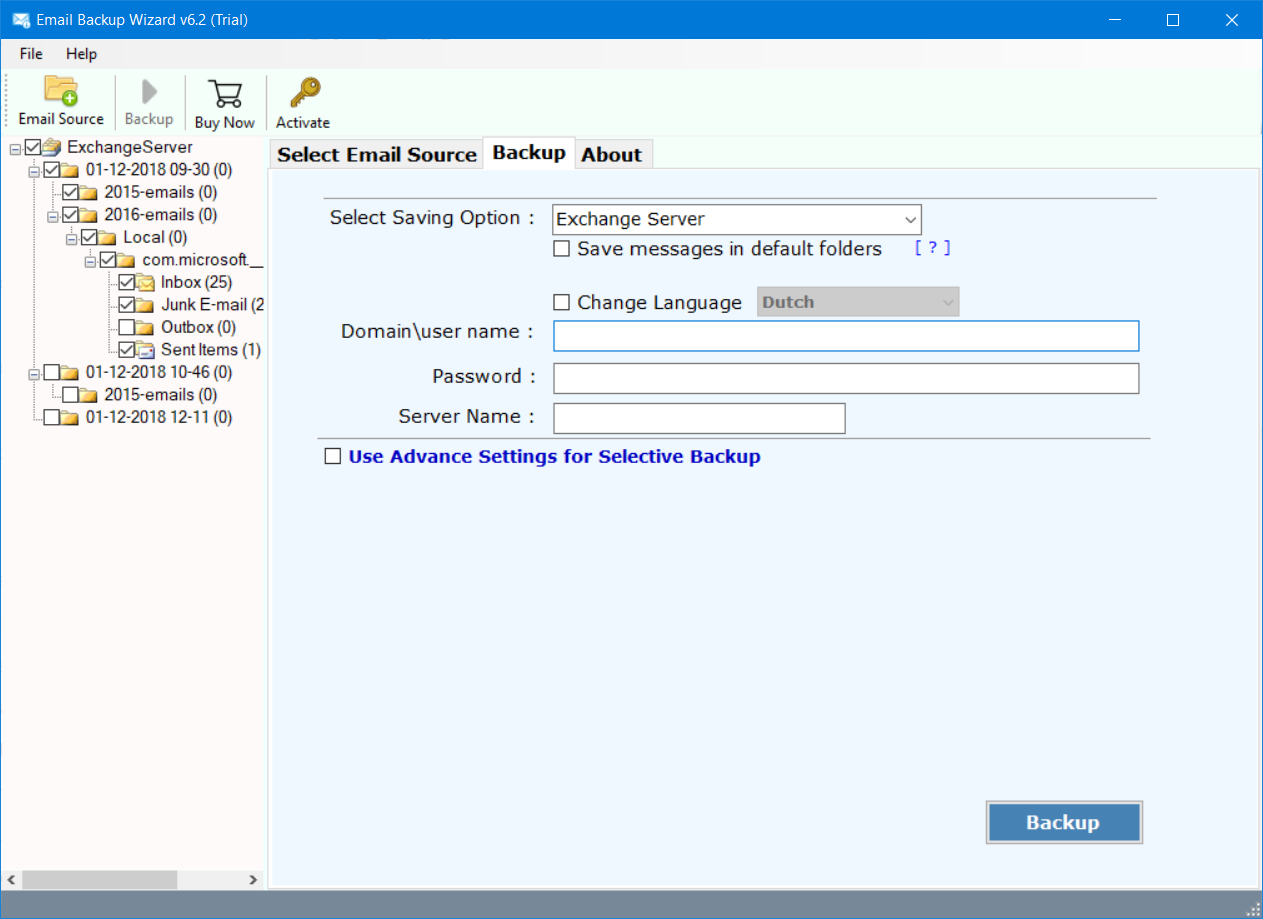
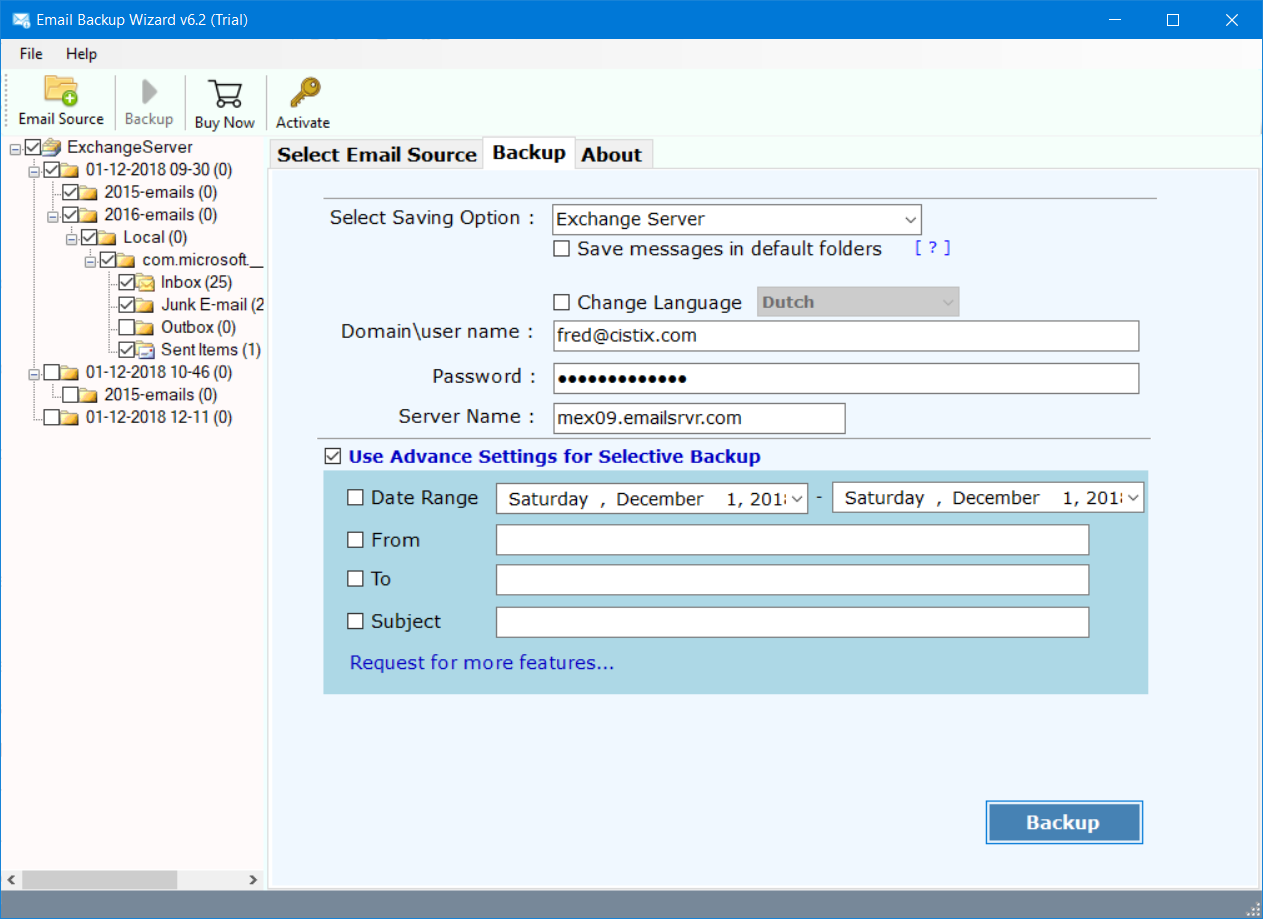
Thereafter, go to the saving options list and choose the Exchange Server option from the list.
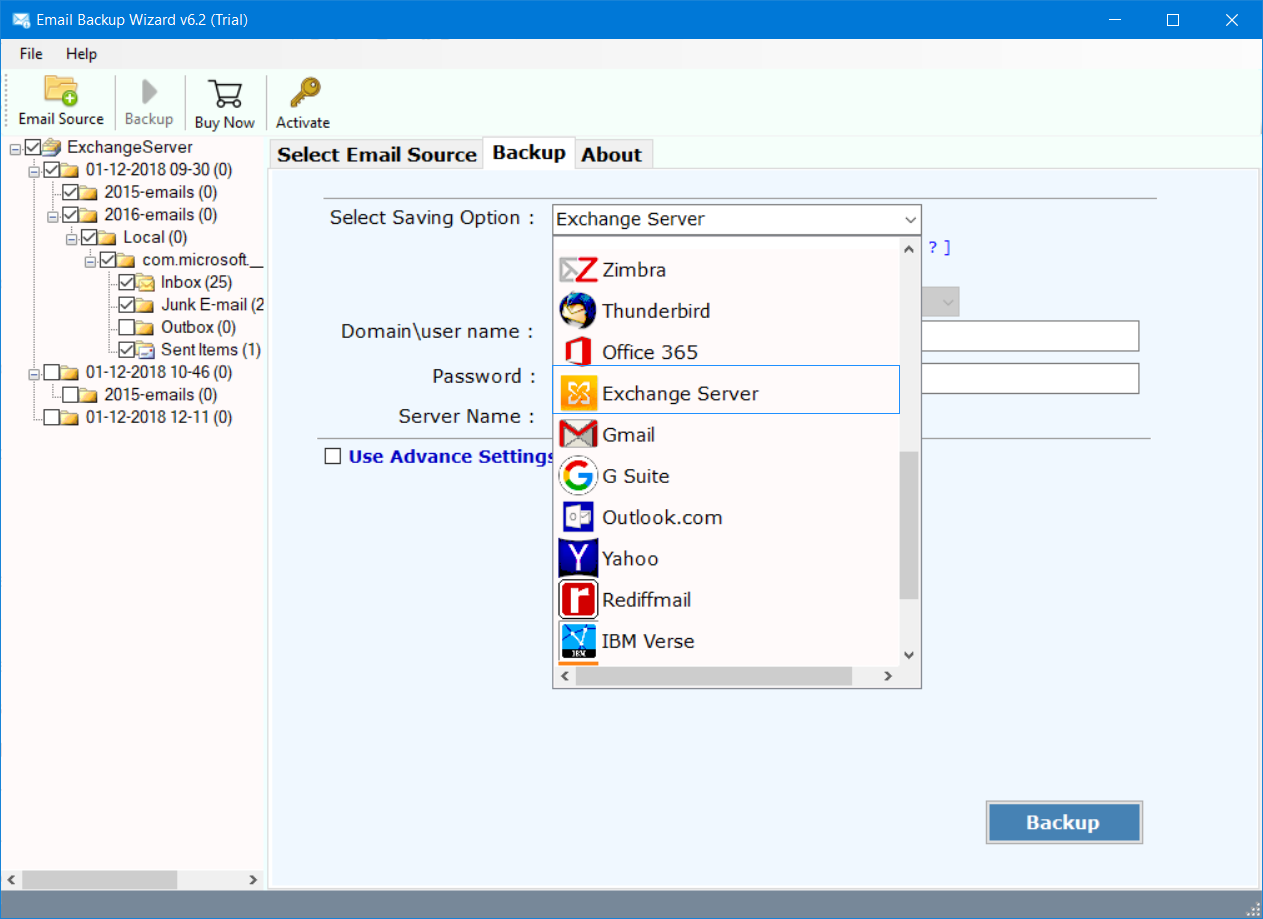
The software will ask the various details of Exchange server such as Domain/ user name, password, server name. Fill them properly for Qmail to Exchange migration.
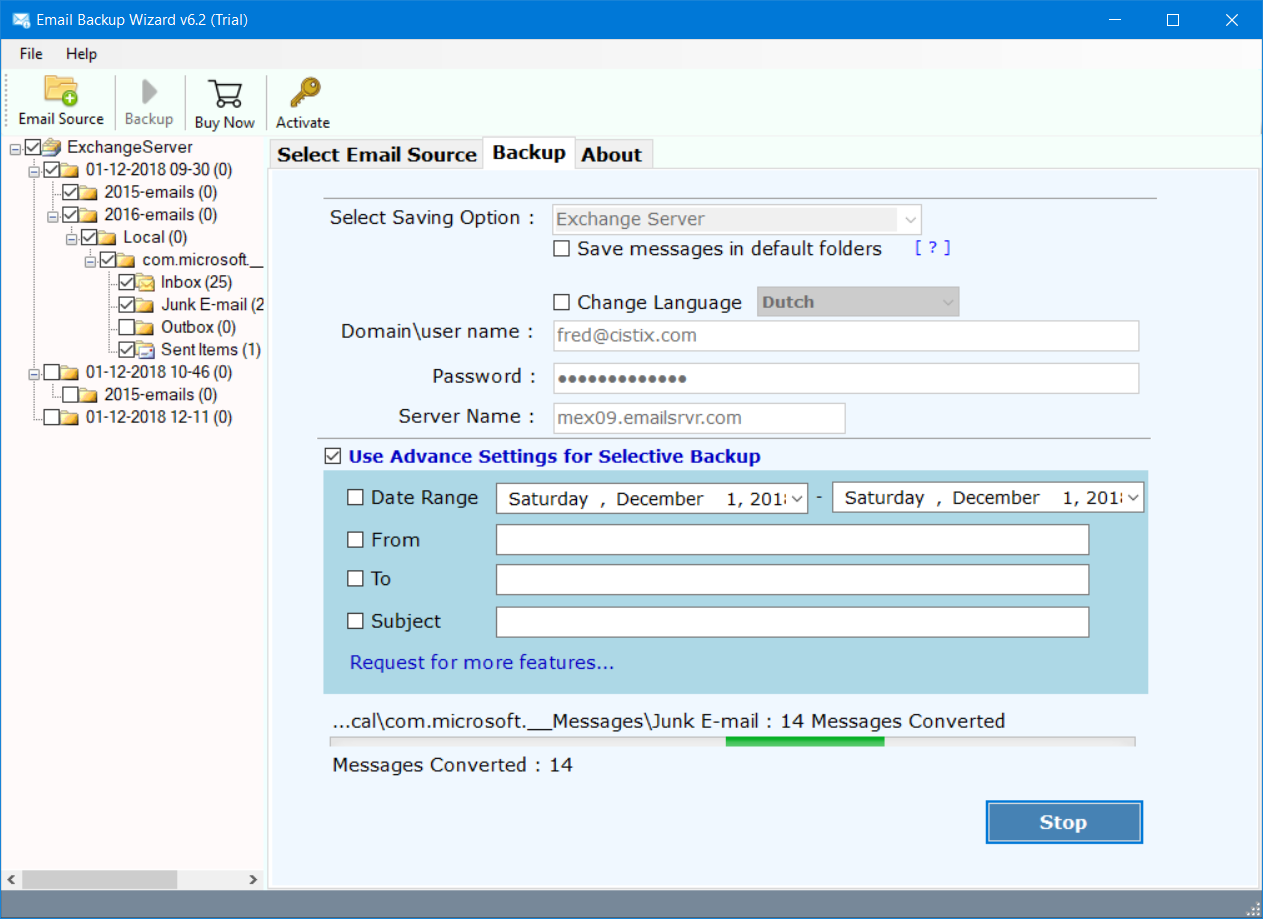
Hit on the backup tab to start to transfer Qmail emails to Exchange server. Now, you can analyse the live conversion report in the software panel.
Transfer Qmail to Microsoft Exchange Server – Benefits & Features
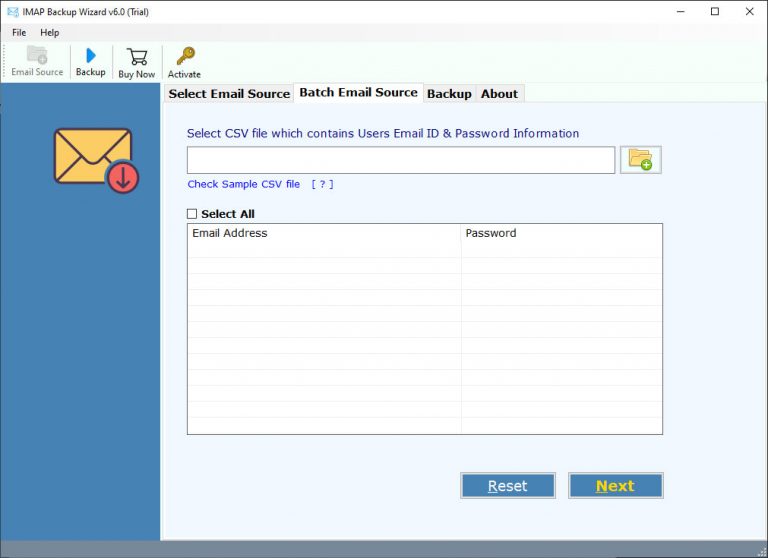
Batch Mode option
For people who have multiple Qmail mailboxes then, enable the “Use Batch Mode” option. To do this, first of all, create a CSV file and input every detail of your Qmail accounts such as the email addresses and password. Now, save this particular file to a safe location on your computer. Hit on the folder icon and import this CSV data file. In the end, tap on the Next button. Hence, in this way, one can easily batch transfer Qmail data to Exchange server.
Advance Mode option
What if you want to move some selective Qmail server emails to Exchange. Then, you can utilize this option “Use Advance Mode for Selective Backup”. It will help you to sort out emails as per date range, subject, email address and you can request for more features too. Therefore, it becomes an easy processing to migrate Qmail to Exchange server.
Quick and rich-featured application
The whole processing from Qmail server to Exchange is very rapid and efficient with this application. This product is made with advanced algorithms and thereby provides instant results with 100% accuracy. It has been designed keeping in mind all requirements of users. Thus, there are no limitations to migrate Qmail server to Exchange.
Transfer Qmail to all Exchange server
With this utility, you have the option to migrate all data from Qmail to Exchange server. Use this application to transfer Qmail to Exchange Server 2019, Qmail to Exchange Server 2016, Qmail to Exchange Server 2013, Qmail to Exchange Server 2010, Qmail to Exchange Server 2007, Qmail to Exchange Server 2003 easily. Work with this software and move all Qmail data to Exchange server without any worries.
IMPORTANT NOTE: No matter what Windows Operating System you are working on, this Qmail to Exchange server migration tool works on all of them. It runs perfectly on Windows 10, Windows 8.1, Windows 8, Windows 7, Windows Vista, Windows XP, etc. No hassle anymore for migration of Qmail server to Exchange. All technical and novice users can run this application without any technical expertise.
Frequently Asked Queries
Q1: How to migrate Qmail to Exchange server?
- Launch Qmail to Exchange migration tool.
- Enter Qmail server details and login.
- Specify required folders and choose Exchange server saving option.
- Fill all credentials of Exchange account and start now.
- Qmail to Exchange server migration process begins.
Q2: Can I work this Qmail to Exchange online solution on my Windows 10?
Yes, why not! The utility runs swiftly on almost all Windows OS including the Windows 10.
Some User Reviews
I receive huge amounts of emails per day on Qmail server. When it comes to migrate Qmail to Exchange server, I got stuck because I’m not aware about any sort of automated solution. However, with Qmail to Exchange server migration tool, my task became much easier than I have ever thought. I can’t imagine how you could make it so better including the amazing customer support. I have purchased the product and currently transferring Qmail emails to Microsoft Exchange server. Thans for the batch file option too in the product.. it’s really awesome!
-Isabella, California
Ich konnte das Qmail installieren, um das Servermigrationstool sofort unter Windows XP auszutauschen. Mit Ihrem Produkt kann ich meine E-Mails effizienter verwalten. Diese Software spart mir viel Zeit und jetzt kann ich problemlos Daten vom Qmail-Server zum Exchange-Server übertragen.
-Agatha, Germany
Time to Conclude
We hope that you liked this write-up. We have explained how you can migrate Qmail to Exchange directly with all attachments in one go. The tool is simple, intuitive and effective to use. There are no file restrictions which you will face while using this application. Only you have to purchase the license keys for unlimited email migration. Use this application to convert Qmail emails to Exchange server with accuracy and with all properties.
Want to Talk to Us ?
If you are facing any hassle while migrating Qmail server to Exchange server, please contact to our technical support team. We are always available for you and will surely try to solve all your queries.
Suggested blog posts:
1. Migrate Qmail to Office 365
