How to Archive Emails from Outlook Web App? Full Tutorial


Data security is a crucial task for every user. That is why, many people prefer archiving their mailbox. If you are an Outlook.com user and want to archive emails from the Outlook Web App. Then, this guide will help you. Here, we are going to explain the benefits from storing your data and the different methods to move them.
“Hello, we are working in a small Office environment where we use Outlook Web App. All the business communication is done through Outlook.com. But, we are having difficulty in setting up the archiving system in OWA. We have 50,000 emails that we want to archive, but we don’t know a simple and standard solution to do that. Can you help us!!”
– Callum, Scotland
Not only for this user there are other people who may have problems with archiving your Outlook.com emails. If you don’t know about Outlook Web, it is a web version of Microsoft Outlook. By using this program users can easily access their Outlook emails to any other devices. If you are working from a remote area, this email client is very helpful.
The Outlook Web App provides you basic email functions, which can cause you several security problems, like accounts being hacked, email corruption, etc. To prevent this situation, archiving is the best solution.
Why Archive Emails from Outlook Web App?
Archive is a process where you move your emails from the primary inbox to another folder. To make sure that your data will be secure. Saving them in different locations helps you for many situations.
- Over time, your mailbox stores a huge amount of data which may create multiple issues. So, moving your important data to another location will not only reduce the storage space. But, also improve the overall performance.
- Stuffed Outlook.com mailbox slows down the speed of doing the tasks. So, by archiving your emails, you can improve the email application speed.
- Archiving your data also helps you in retaining your data. If something happens to your account, you can easily get your important data.
- Having your Outlook.com emails to another location also helps you to minimize email loss.
- Managing your emails becomes easier as you can organize your emails and store them according to your need.
- To transfer your data from another device, the archive file becomes a backup copy.
So, you will get many benefits by archiving data. Now, it is time to see the different ways to archive emails from Outlook Web App.
Save Outlook Web to Archive Folder with Built-in Feature
To simply store your Outlook.com data to another location. There is a built-in archive function, which you can use. Here are the steps to follow them.
- First, sign in to your Outlook Web App account on your browser.
- Then, go to the mailbox and choose the emails you want to archive.
- Click on the Move To option from the top menu. Then, select Archive.

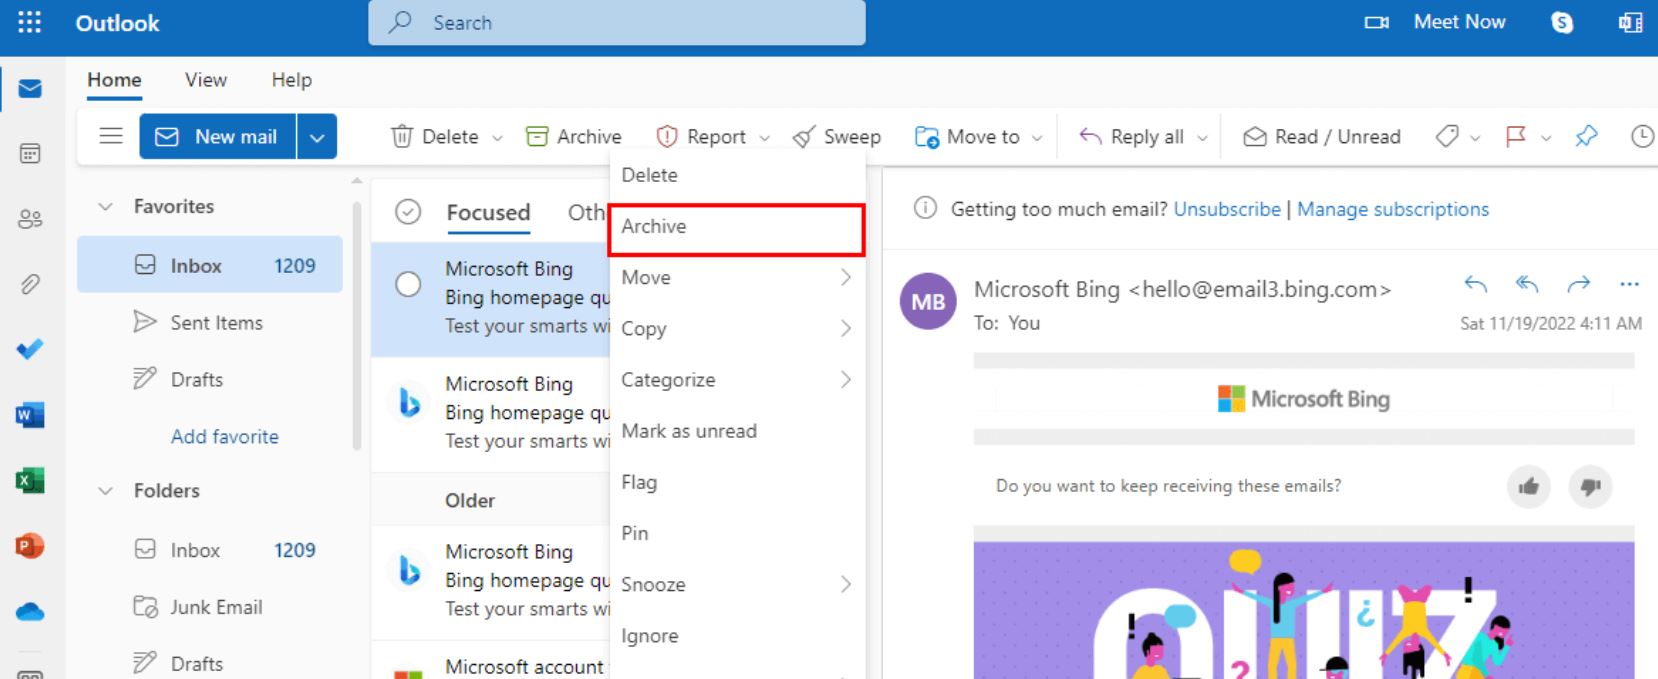
To select multiple emails, you can click on the checkbox above the list of emails. This is a direct way to archive your data, but for some issue, you are unable to use this option. Then, you can use the next method.
Archive Outlook Web App Emails to Desktop Outlook Application
Users can use the Outlook Desktop application to move their emails. Here, first configure your OWA email account with the Outlook. Then, archive your data.
- Go to the File >> Account Settings >> New Account option.
- Provide Outlook.com email address and password. Choose the IMAP/POP option.
- Outlook automatically connects your account. So, you have to wait till it syncs your account and data.
- Although Outlook auto-archives your data, if you didn’t enable this option. Then, follow the next step.
- In the File option, click on Options then select Advanced.
- Click on the AutoArchive Settings under the AutoArchive option.
- Now, set how frequently you want to run autoarchive.
- Select Archive or delete old items option, click show archive folder and choose default folder settings. Press OK to save the changes.
- Go to the folder where your Outlook web emails are stored. Right-click to it.
- Select the Properties and then click the AutoArchive option.
- Choose default settings or override with folder specific settings.
- Lastly, click on OK.
This method is lengthy but you can move your data from Outlook.com to the archive folder. Both the manual methods are free to use, but saving multiple data can be a difficult job. Also, you may face issues like data not properly archived. To avoid these types of problems, the next method will help you.
Move Outlook Web Emails using Professional Software
For an effective solution, RecoveryTools Outlook.com Backup Software will help you. This tool is a robust solution for archiving bulk Outlook Web App emails as it offers you to save your emails to a local drive or any other account. It is much easier to use and provides you with a date filter option which you can use to save selected data. The program has a demo version which you can download for free and use it for a limited round. To know how the tool works, below are the steps you can follow.
Steps to Archive Emails from Outlook Web App
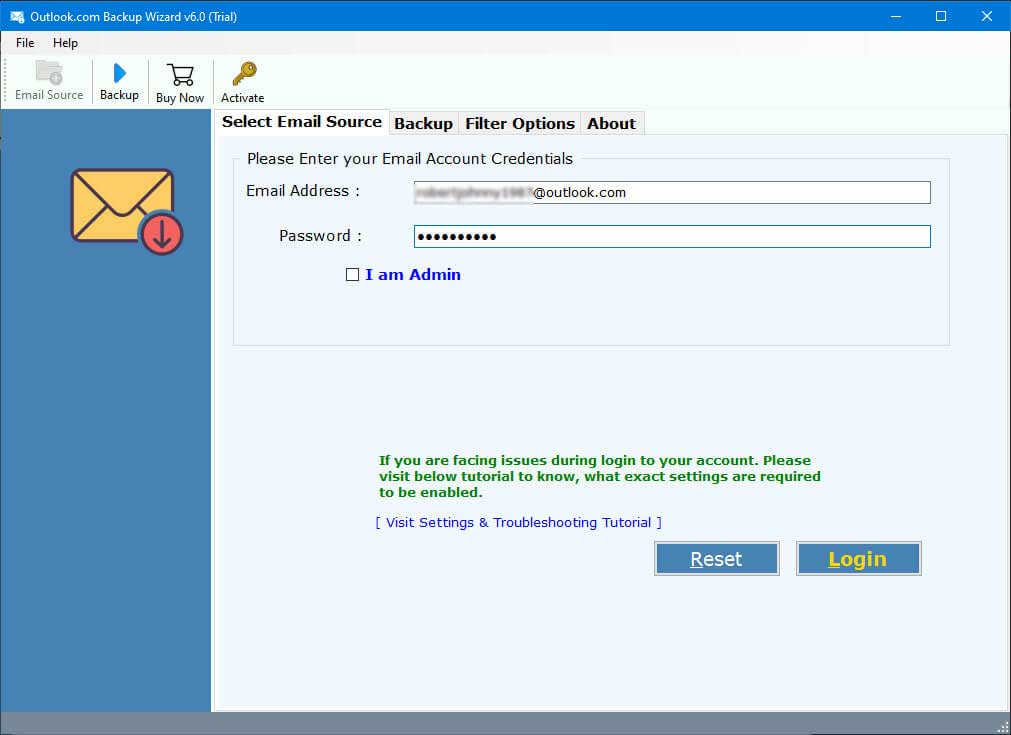
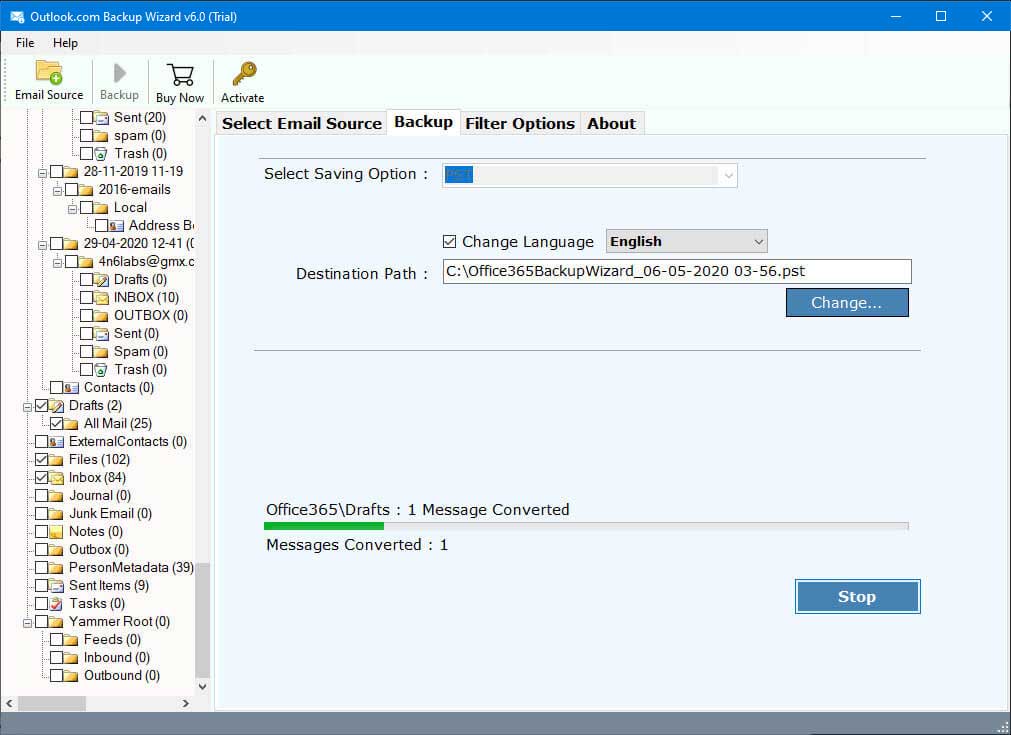
- Launch the software and enter the login credentials of your Outlook Web App account. Click on the Login button to continue.

- Thereafter, the software starts loading your OWA mailboxes into the toolkit. Specify the required ones which you want to archive from the Outlook Web App account.
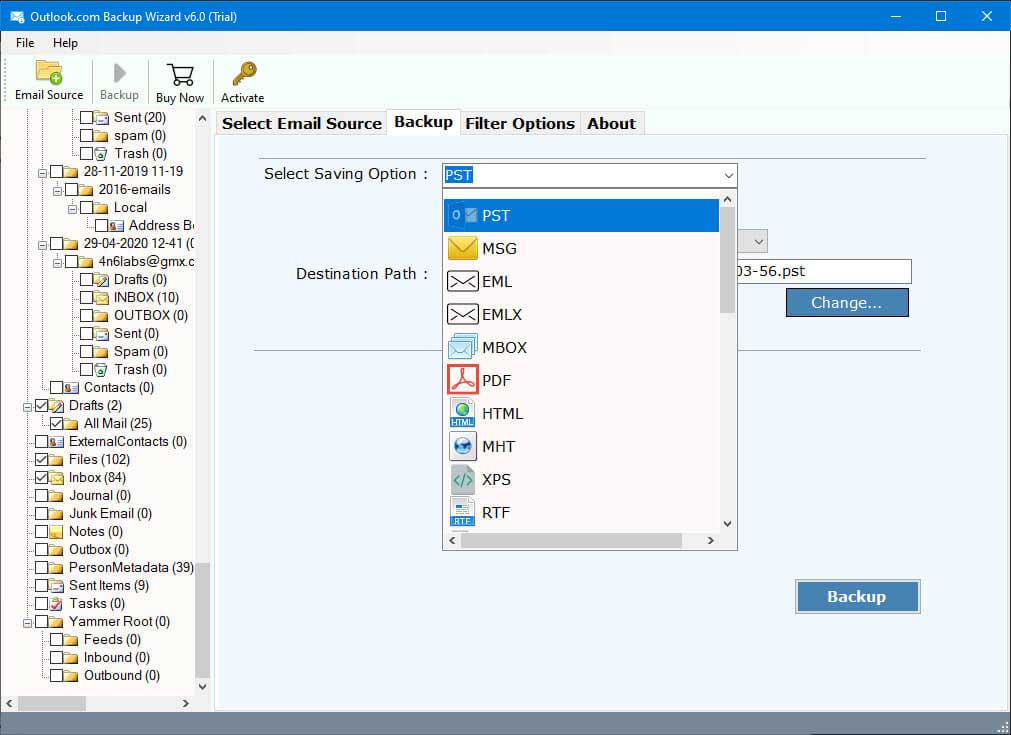
- After that, go to the Saving options list and choose any saving option.
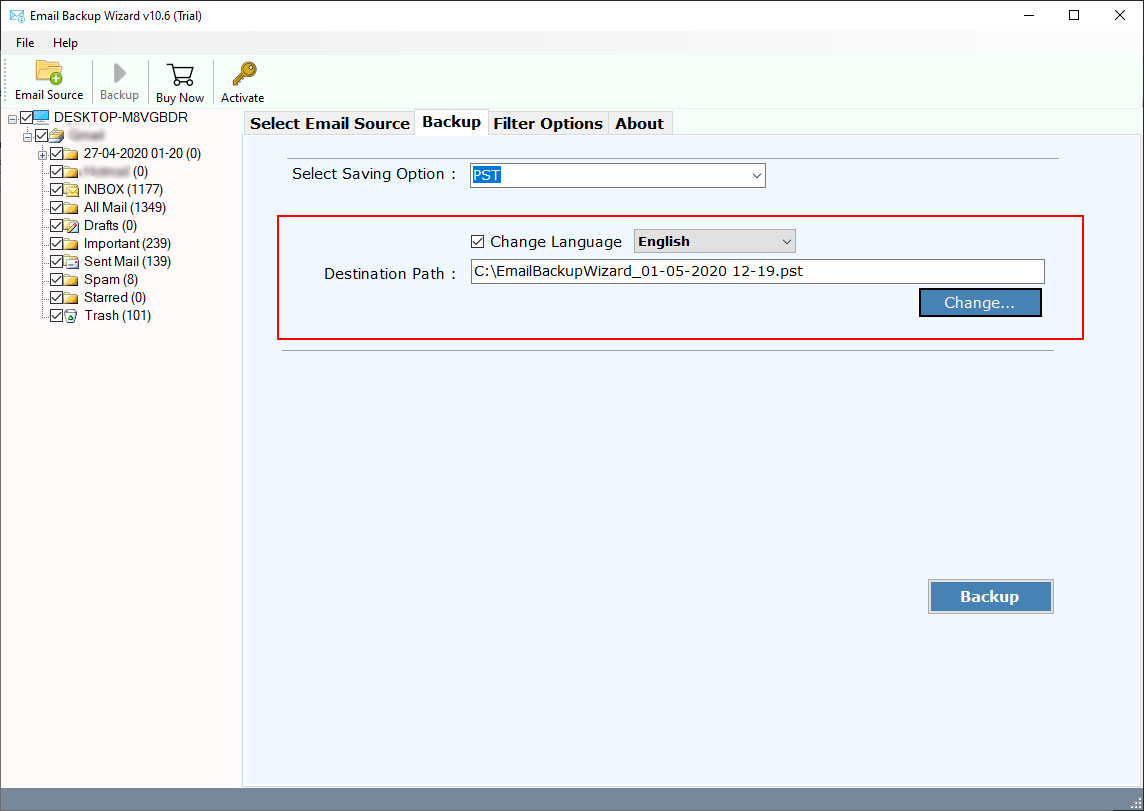
- After that, browse a location for saving the archived Outlook Web App email messages.

- Finally hit on the backup button to begin the process of archiving your account.

For advanced backup, the software offers many advanced features which we mentioned below.
Advanced Features of Professional Tool
- This software gives options to save Outlook Web App emails to different formats like PST, EML, MSG, EMLX, MBOX, HTML, RTF, DOC, XPS, PDF, etc.
- You can use this tool to move your important emails to other email clients, such as like Mac Mail, Apple Mail, Thunderbird, Zimbra, Lotus Notes, Window Live Mail email client.
- It quickly batch export Outlook Web App emails in a single go with complete data attachments and attributes.
- There is a filter option which you can use to sort out your data as per date interval, email address, Subject, etc.
- It keeps all email folder hierarchy, data integrity and maintain email structure after completing the process.
- You can conveniently install the suggested application on any Windows OS like Windows 10, 8.1, 8, 7, XP, Vista, etc.
Common FAQs
How can I auto archive in Outlook Web App?
To auto archive your Outlook.com, you have to first configure your OWA to desktop Outlook. Then, go to the File option and select Auto Archive setting from the Auto Archive option.How to enable online archives in the Outlook app?
For your online archive in Outlook, you have to first enable the archive in Microsoft 365 admin center. Then, in your Outlook folder you can see the Online Archive.aWhat is the shortcut in Outlook Webmail for archive?
select your email message and press the backspace button. The email will automatically go to the archive folder.
Conclusion
Archiving your Outlook.com emails can be very beneficial. That’s why, here we helped you by providing three easy solutions to archive emails from Outlook Web App. The first two are manual methods which are free to use but you may have difficulty doing so. But, the professional software is a great option to bulk archive as you can easily do your job without any issues.
Also Read