How to Convert TIFF to BMP Without Losing Data?


If you also want to convert TIFF to BMP, then you have come to the right place. Here, we will explain how to save your TIFF files in BMP format without any data loss. Users often think about convert TIFF to BMP because BMP format opens more easily in Windows applications and older software. BMP files are also simple for editing and load much faster. This means that for compatibility, fast access, and easy editing, convert TIFF to BMP becomes necessary for optimal results.
In this blog, we will guide you on how to convert TIFF to BMP without wasting your time. We’ll explain both the manual method and the professional method so you can choose whichever suits you best. So, let’s get started!
Difference Between TIFF and BMP
TIFF: (Tagged Image File Format) is a high-resolution file format that offers Original quality compression and is used primarily in photography, publishing, and scanning. It can support multiple pages and layers in a file, which is very useful for archiving or for professional editing. TIFF files are regularly much larger than other formats.
BMP: (Bitmap) is the simplest and uncompressed file format. It is used across nearly all Windows applications and by older operating systems. Normally, BMP does not offer advanced features like other formats, but it is very easy to open and sometimes is the only option, depending on existing software. BMP files are very fast to load and are best for basic editing or compatibility.
Read More: Convert XML to JPG
Reasons for Convert TIFF to BMP File Format
There are situations where it is necessary to convert TIFF images to BMP:
- Software Compatibility: Some applications and legacy hardware may not be compatible with TIFF files, but will work well with BMP files.
- Easier Editing: As BMP files are uncompressed, it’s easier to edit them in MS Paint, CorelDRAW, and other editing applications.
- Faster Processing: Since BMP does not use heavy compression for images, each image will load faster in some instances.
- Archiving: If you are preparing images for old hardware or if you need the actual raw raster data, BMP is typically the standard.
Manual Methods to Convert TIFF to BMP
We will have to use different processes for Windows and Mac. Below are the well-explained steps to complete the conversion on both machines particularly.
Using Microsoft Paint (Windows)
- Firstly, right-click on your TIFF file and select Open with Paint.
- Then, once the image opens in Paint, click on the File menu.
- After that, choose Save As and from the dropdown, select BMP Picture (*.bmp).
- At the end, select the location where you want to save the file and click Save.
Using Preview (Mac)
- First of all, double-click on the TIFF file to open it in Preview.
- Then, go to the File menu and choose Export.
- Then, in the format dropdown, select BMP.
- Lastly, choose the destination folder and click Save.
Drawbacks of Using This Method
The manual conversion of TIFF to BMP is suitable for a few files, but it is limited. It only supports one conversion at a time and is slow if a user wants to convert several files. It has no advanced options for batch processing or preserving metadata, which is not ideal for users converting a lot of TIFF images. Also, repeated saving is subject to human error, and there is no flexibility in saving options.
Read More: Convert XML to vCard
Automated Method to Convert TIFF to BMP
Users who often have to process large bulk of TIFF files can choose a professional solution to save time and effort. A proven tool is the TIFF Converter by RecoveryTools for converting TIFF to BMP easily. With this software, you can convert TIFF files into BMP files in bulk without quality loss or errors.
There are several advanced features that make this software easy to use and convenient. The professional software does what it does best if you want to convert one image or multiple TIFF files at the same time. The software promises accuracy, speed, and efficiency every time. All you have to do is follow the directions of the tool step by step, and in no time, you can save your TIFF files into a BMP format.
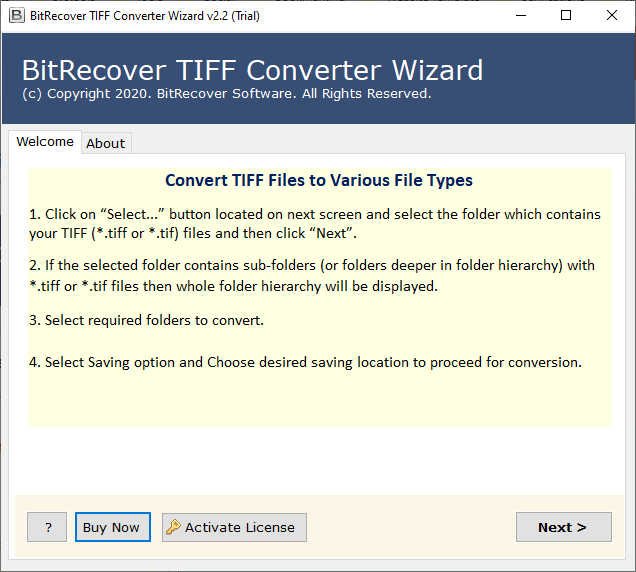
Simple Steps To Use This Software
- Firstly, install the solution in your system.

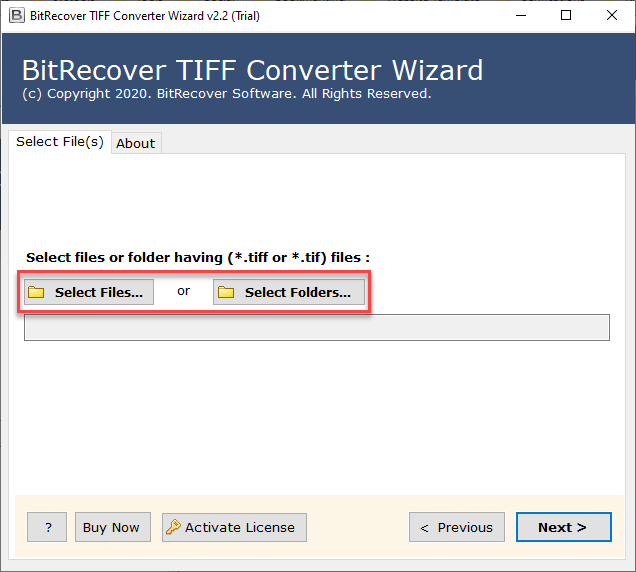
- Now, choose your data to upload with Select Files or Select Folders.
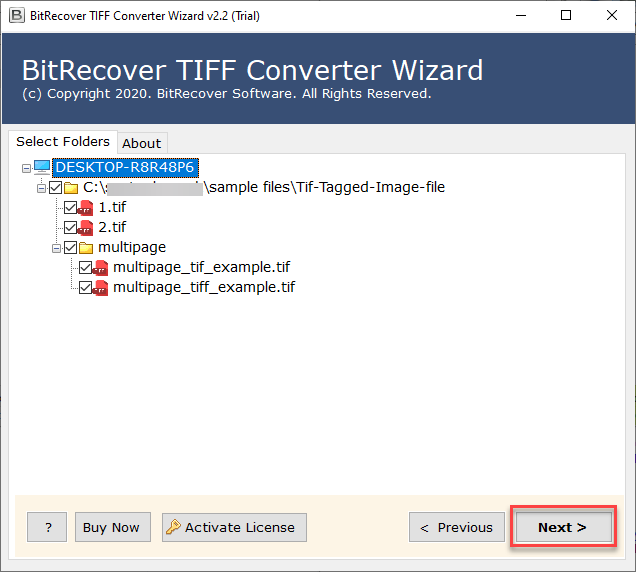
- Preview all the uploaded TIFF files carefully before proceeding.
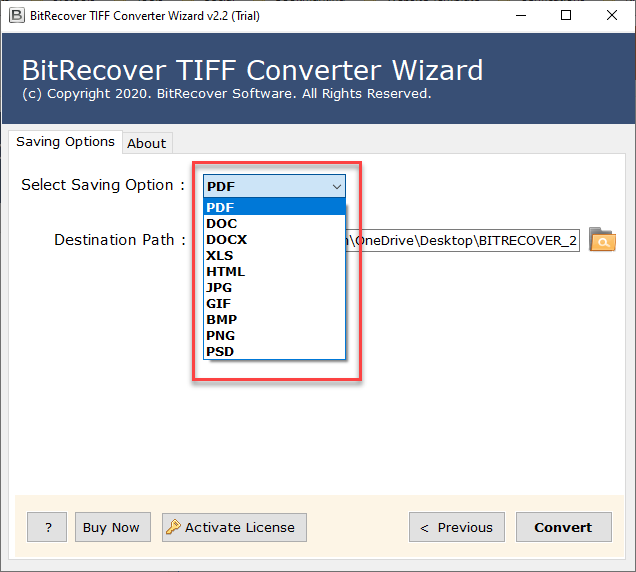
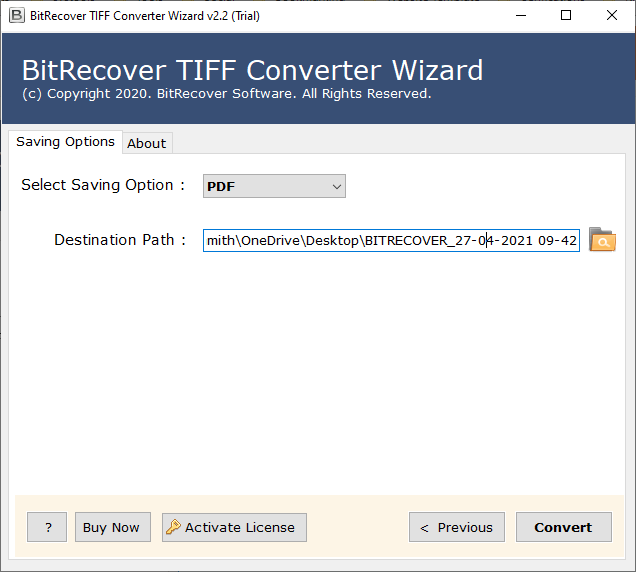
- Now, choose BMP format to convert TIFF to BMP image format.
- Then, choose the destination location and click on the Convert button.
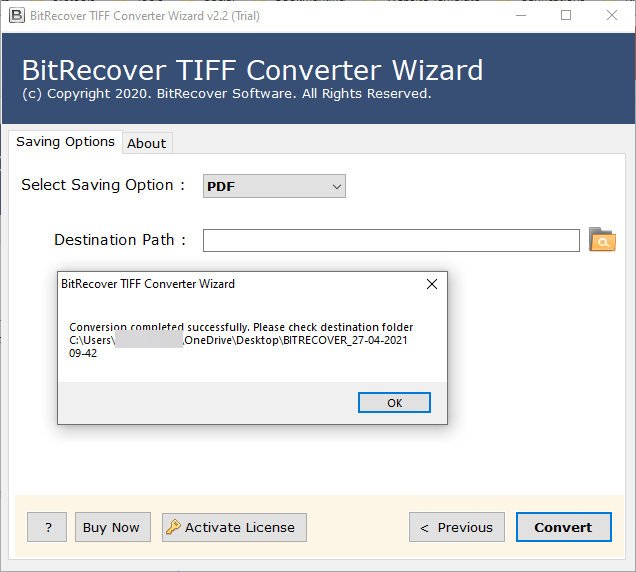
- Once the conversion process is done, you will be notified.
Key Features of This Professional TIFF to BMP Converter
- Allows you to bulk convert TIFF to BMP safely, quickly, and without data loss.
- Works as an independent software that performs the entire TIFF to BMP conversion without requiring any other application.
- Fully compatible with both the latest and older versions of Windows and devices, ensuring smooth performance everywhere.
- Maintains data integrity and file structure, keeping your TIFF images intact while converting them into BMP format.
- Provides the option to choose your preferred location to save the converted BMP files for easy access and management.
Conclusion
In Conclusion, this blog showed you how to convert files from TIFF to BMP without any loss of image quality. You can convert TIFF files to BMP using a manual method or the professional method and complete the conversion process simply and efficiently. By following the instructions in this post, you will easily and safely convert TIFF to BMP. Using a professional tool is even more useful if you plan to convert multiple TIFF files to BMP because it saves you time and reduces the risk of data loss. You can now select the best option for you and be on your way to easily converting your images.
Read Next: Convert TIFF to PNG