Guide to Migrate Ability Mail Server to Exchange Server


Are you looking for a solution to migrate Ability Mail Server to Exchange Server? If yes, then this article provides you the best solution to deal with it. A user can easily transfer emails from Ability Mail Server to Exchange Online without any issue. You only need to provide the credentials of your Exchange account to perform the migration.
Ability Mail Server gains a lot of popularity when released first due to its easy setup & configuration process. However, in recent times, a trend had been observed of users is looking to get away from Ability Mail Server to Exchange Server.
The reason is quite obvious. Microsoft Exchange Server has a name in the field of management of any organization’s user mailboxes. Hence, there are plenty of users who have plans to export Ability Mail Server to Exchange Server account.
Our organization is using the Ability Mail Server for the management of emails. But we are planning to migrate the Ability Mail Server to Exchange Server. We know that the process to do Ability Mail to Exchange migration is very hard. Hence, please help us to find a professional toolkit that will allow exporting Ability Mail emails to Exchange Online account easily.
The above query explains the need of moving the Ability Mail Server to the Microsoft Exchange Server.
Best Solution to Migrate Ability Emails to Exchange Online
A user can export Ability emails to Exchange Online server easily using RecoveryTools Ability Mail Migration Software. The utility will provide its users a direct option to transfer Mail Server accounts from Ability Mail Server to Exchange Server. It will only ask the users to provide the login credentials of their Exchange Server account. It addition, the tool allows to export Ability Mail emails into different savings like Yahoo, and more.
Free download the setup of this software from the below button:
Free Trial Limitation: The above button will allow the users to free download the setup of the Ability Mail trial edition. A free demo of this tool will allow the users to convert only the first 25 emails from each folder. However, if you want to migrate more than 25 emails without any limitation, then you first need to activate this tool.
Steps to Export Ability Mail Server to Exchange Server
- Run the tool & load Ability Mail Server mailboxes in it.
- Choose only the required Ability Mail Server mailboxes.
- Select the Exchange Server option from the 30+ saving list.
- Setup Ability Mail to Exchange migration options.
- Click the Convert button & analyze the live conversion process.
Amazing Features of Ability Mail to Exchange Migration Software:
- Easy to Use & Simple Tool
This utility is a very easy-to-use program for the conversion of emails. You do not need any technical knowledge to use it. It will allow the users to convert only the specific emails from Ability Mail to Exchange Online accounts without any issue. This tool will provide a step-by-step procedure to transfer emails between the mail server.
- Transfer Emails with Attachments
The Ability Mail to Exchange Converter tool will transfer the emails along with inserted attachment files. This toolkit supports the conversion of all types of attachment files including documents, images, Office files, Notes, contacts, etc. Hence, it will enable the users to convert both Normal Attachment Files & Embedded Attachment files.
- Retains Email Metadata & Properties
This utility will preserve the original email meta & properties (To, From, Cc, Bcc, sent date, receive data) during the transfer process of the Ability Mail to Exchange Server account. It will not make any changes to the original components like email headers, hyperlink objects, HTML signature, etc.
- Export Emails with Same Folder Hierarchy
The Ability Mail to Exchange Migration tool will allow the users to export emails with the same folder hierarchy. So, it will not make any changes in the on-disk system folder hierarchy of mailboxes. The emails from the folder of Ability Mail will transfer to the same folder in the Exchange account.
- Transfer Only Selective Ability Mailboxes
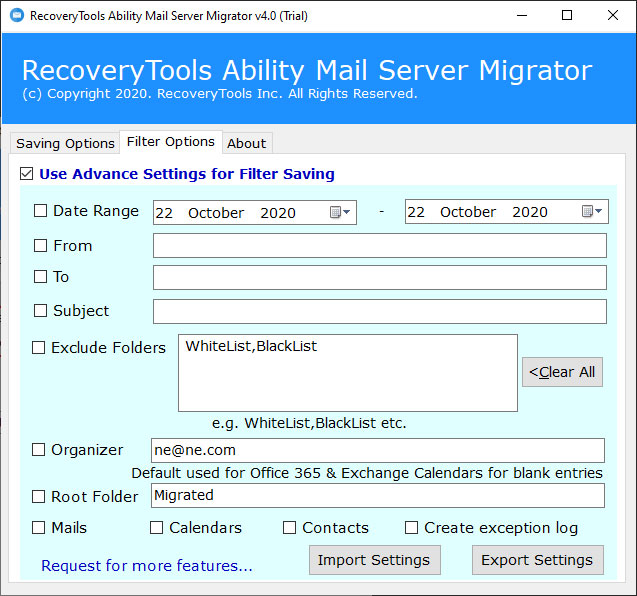
The Ability to Exchange converter will support the selective conversion of Ability mailboxes to Microsoft Exchange Online account. Users can do this by applying the filters settings. The software provides many advanced filters settings on the basis of certain parameters like Date Range, From, To, or Subject.
Understanding Working of Ability to Exchange Online Migration Tool:
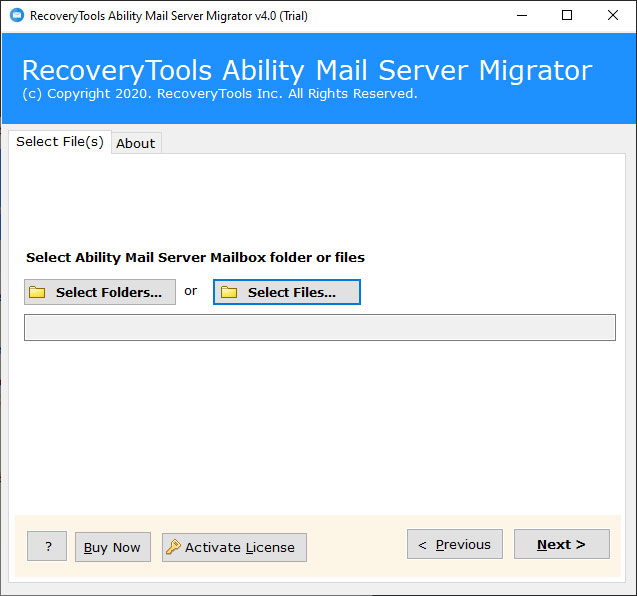
- Install & run the software on your Microsoft Windows OS computer. It will list some certain instructions like how to convert Ability Mail Server Mailboxes to Exchange Server account.

- A user now has two ways to load Ability Mail Server data in the software panel i.e., Select Files or Select Folders Choose any of these options according to your choice.
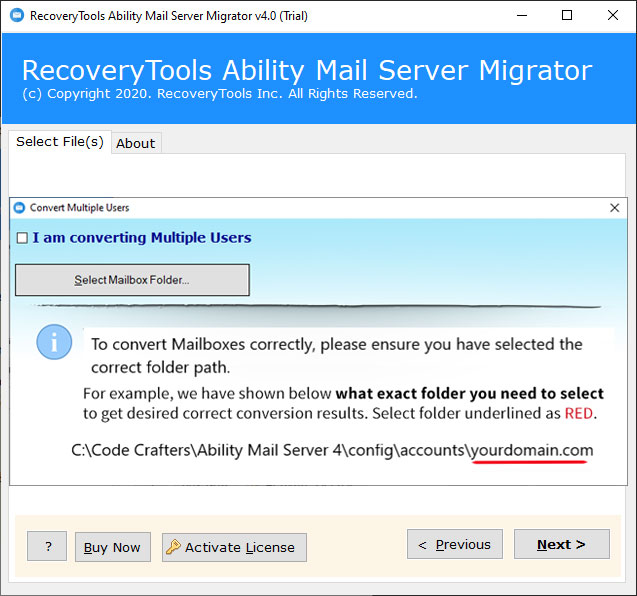
- The users can also enable I am converting multiple users’ options to select multiple user’s mailbox data.
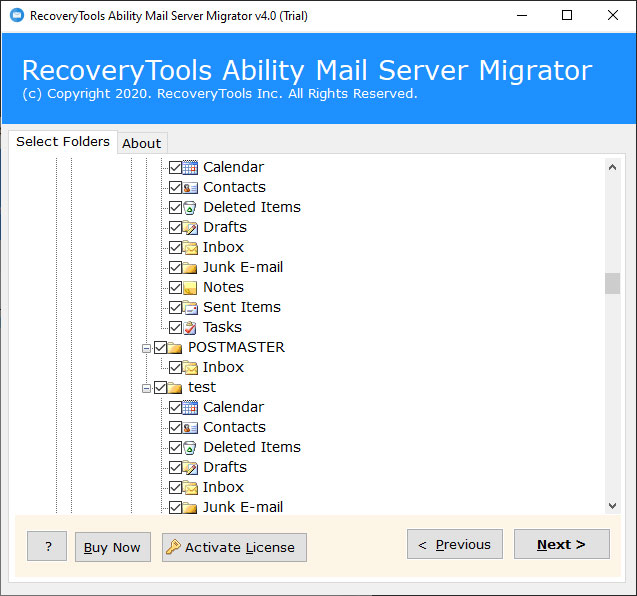
- Now, the software will list all the Ability Mail Server mailboxes in its panel. Choose only the required Ability Mail Server mailbox items from here.
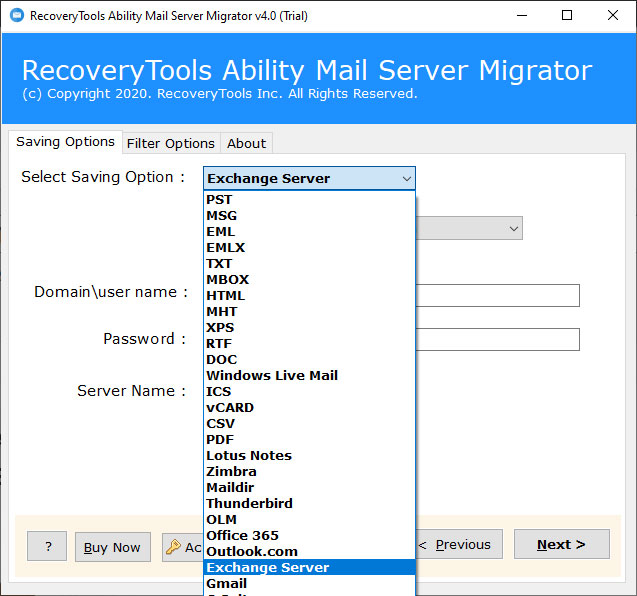
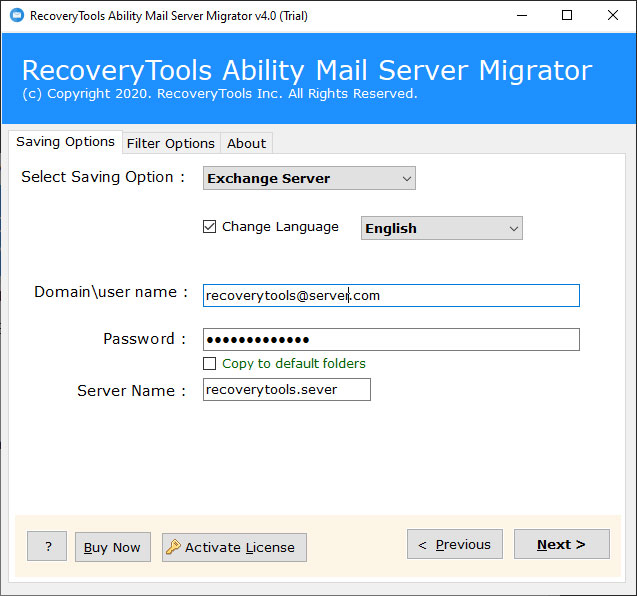
- In the next section, select the Exchange Server option from the list of saving formats provided by this tool.
- Users can also export only specific mailbox items by applying some filters settings. You can allow the filters on the basis of certain parameters.
- Now, the tool will require the credentials of the Exchange Server account for the migration. Hence, enter the details of the required fields & click on the Next button to process further.
- Users can preview the entire Ability to Exchange migration process with all details including the number of files converted & the current folder.


How to Activate this Tool?
The process to activate the Ability to Exchange migration utility is very simple. Users first need to complete the purchase process. You can get the purchase links in the software panel. You will instantly receive an email as soon as you finished the purchase process. The email will contain the activation key. Hence, copy & then open the tool, click on the Activate License button, and then paste the code. Finally, click on the Activate button & your tool is ready to use.
