How to Forward Gandi Mail to Gmail? Complete Guide


Gandi Mail is a French based company that provides various services like web hosting, domain name registration, email, and SSL certificate with an aim to make the internet accessible to all. Recently it has announced that it has ended its free mailbox services, made some changes in its mailbox capacity, and introduced some new features for its paid users. This has created a need among its users to migrate their mailbox to other email services like Gmail. Therefore, in this article, we will provide you with a complete guide to forward Gandi mail to Gmail.
Table of Contents:
Why do you Need to Migrate Gandi Email to Gmail?
Gandi Mail has announced that it has ended its free mailbox services with effect from 30 November 2023 and thus as a user of its services you have only two options, either purchase their paid version or migrate your mailbox to other email service providers like Gmail. This rule stays for all users whether their domain is set to expire before or even after the mentioned date otherwise your mailbox will cease functioning.
With a limited number of days remaining you don’t have any other option but to take the paid version. But, if you don’t want to go for the purchase then don’t worry as in the next section, we have discussed the ways following which you can easily migrate Gandi email to Gmail.
Manual Method to Forward Gandi Mail to Gmail
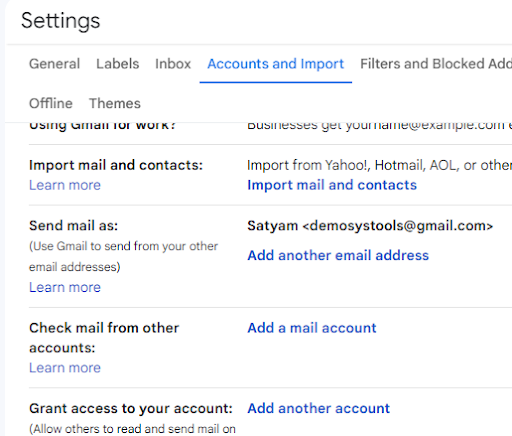
- Open your web browser, “Login” to your Gmail account, and then click on the “Settings” icon.
- Go to the “Accounts and Import” tab and in “Check mail from other accounts” click on “Add a mail account”.

- Now enter the email address of the account you would like to add and click on “Next”.
- Next, provide the username and password of your “Gandi.net” email account.
- Under the POP server fill “mail.gandi.net” and in port fill “995”.
- Click on “Add Account” and then select the option to send email from Gmail with this new email address.
- Next, leave the “treat as alias option selected” and select that you would like to send mail through Gmail.
After this just follow the prompts and you have successfully finished the linking process.
This manual method may not suit every user as it is very time consuming and you need good technical knowledge to successfully complete the process without any data loss. Thus, we bring you an alternate solution to forward Gandi mail to Gmail with the help of professional software. Let us understand how you can do this easily in the next section.
Migrate Gandi Email to Gmail using Professional Software
The manual method is very time consuming and there are high chances of data loss if anything goes wrong, thus, a better option will be to connect Gandi mail to Gmail using RecoveryTools IMAP Backup software. You can easily create a backup of your Gandi emails by selecting the saving option to Gmail.
Steps to Forward Gandi Mail to Gmail
Let us discuss the steps following which you can easily migrate Gandi email to Gmail:
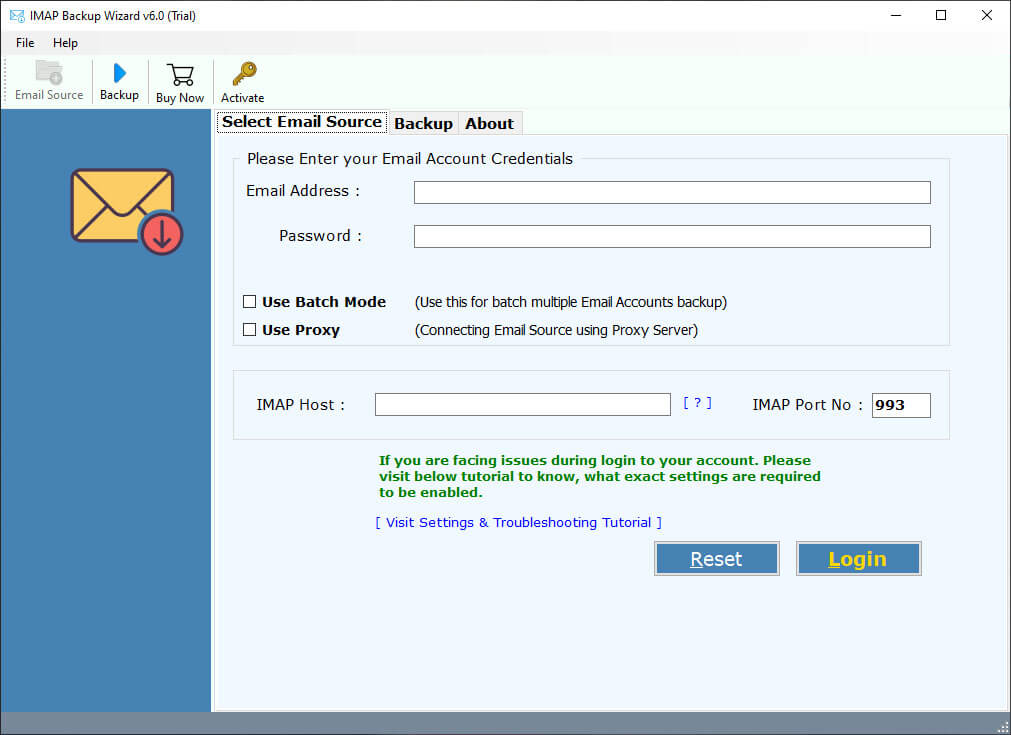
- Go to “All Programs” and open the professional IMAP backup software, provide your login credentials, and after that click on “Login”.

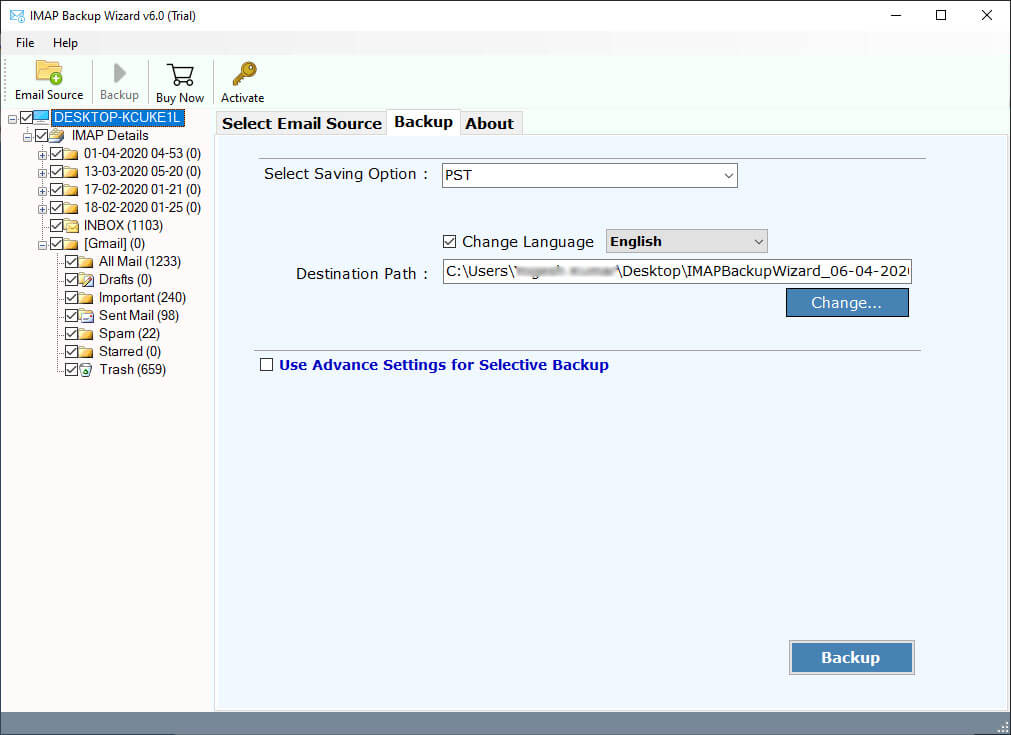
- The software allows you to create a backup of only the selected email folders.
- Now under the “Select Saving Option” scroll down the drop menu and select “Gmail”.
- You can also use “Advance Settings for Selective Backup” to backup only the selected emails from the IMAP server.
- Next, click on the “Backup” button to start the IMAP email backup process.

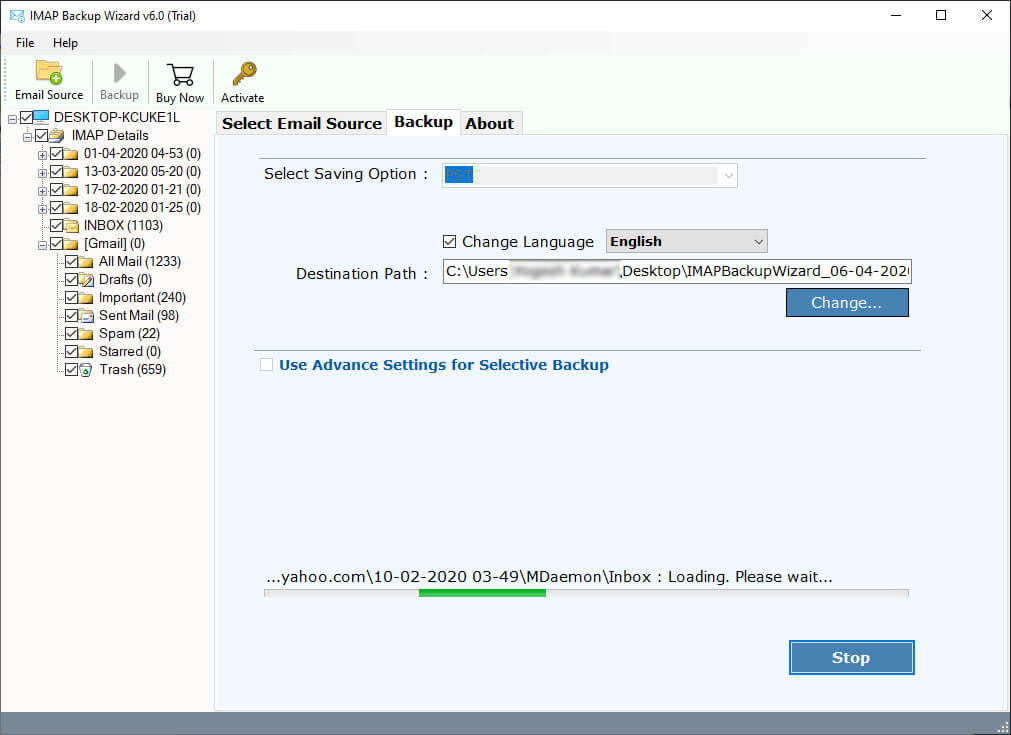
After the completion of the backup process, you will receive a popup message confirming the same. You are now done with the process to forward Gandi mail to Gmail.
Note: Your regular account password will not work here, you have to create an App password here and use the same to log into your account. If you don’t know how to do that then you can take the help of the guide displayed in the software.
Why is Professional Software Better than the Manual Method?
- The manual method is very complicated and time consuming whereas a user can save a lot of their time while using professional software to forward Gandi mail to Gmail because of its user friendly interface and automated backup process.
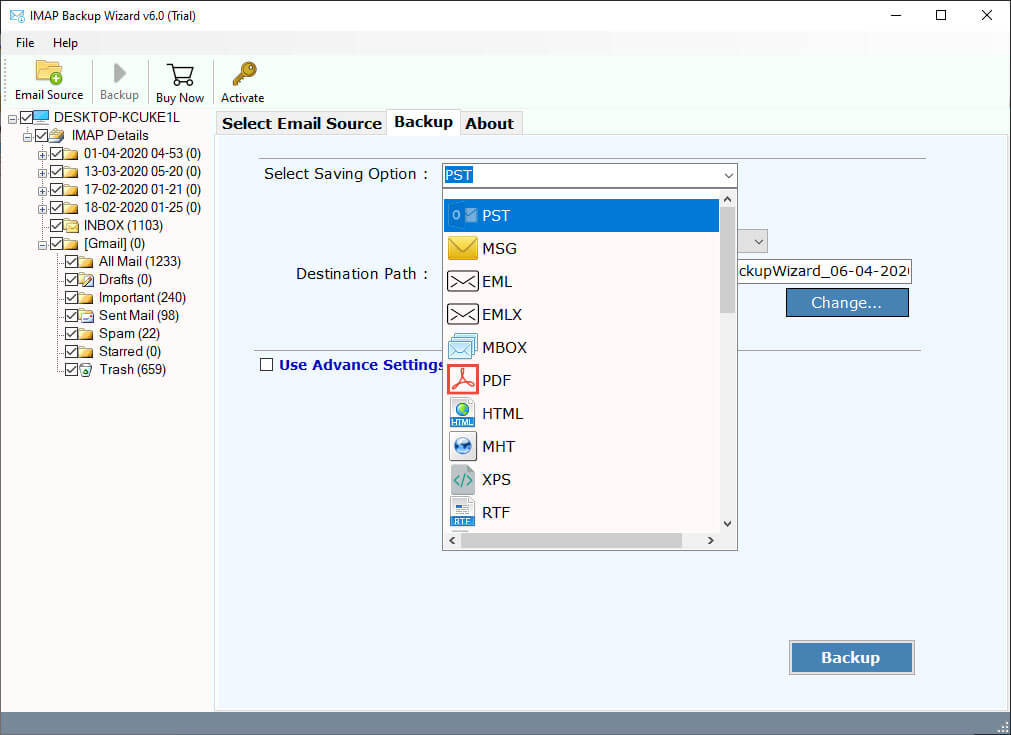
- Using professional software, you can create a backup of single as well as multiple IMAP server mailboxes in various file formats like PDF, PST, MBOX, EML, MSG, etc.
- The software allows you to create a backup of selective email folders with attachments which is not possible using manual methods.
- The professional software also provides you an option to connect your IMAP server from anywhere with the help of Proxy Server Support.
- Another impressive feature of this software is that after completing the backup process, it maintains the original email folder hierarchy structure as per your IMAP mailbox.
Conclusion
Gandi Mail provides a variety of services but, due to its recent announcement to end its free mailbox users are left with two options, either take a paid version or migrate their mailbox to other email clients like Gmail. As a solution, we have discussed different methods following which you can forward Gandi mail to Gmail. But, using the manual method isn’t an ideal solution as it is very time consuming and there are high chances of data loss. Therefore, an ideal solution for you is to take the help of the IMAP backup software mentioned above in this article and make their backup process 100% secure and easy.
