How to Resolve Microsoft SQL Server Error 2 – Unable to Connect with LocalHost


Overview: Want to know the solutions to fix Microsoft SQL Server error 2 ? If so, then you’ve arrived at the right post! This technical blog post discusses various techniques to fix the “cannot connect to localhost SQL Server” issue.
Many small and large organizations store their informative data using the SQL Server database. However, its popularity makes it error-prone, and one such error is the “SQL Server error 2,” and it disrupts database connectivity. It occurs due to a network-related issue that hinders establishing a connection to the SQL Server database. If you are looking for solutions to fix this error, read this blog to know the suitable ways to fix the “Microsoft SQL Server, error: 2” issue.
Let’s See How the Error Appears

Microsoft SQL Error 2 typically occurs when a client application attempts to connect to the SQL Server instance but fails due to various potential reasons. It is essential to know the root causes of error 2 in SQL Server and effective approaches to resolving the error code 2.
Why SQL Users Experience the “Cannot Connect to Localhost SQL Server” Issue?
The need to resolve the Microsoft SQL error 2 can arise due to various reasons such as network connectivity issues, SQL Server Service not running, firewall restrictions and more. As we all know, SQL Server is the most prominent relational database management system (RDBMS) developed by Microsoft.
Here are some common reasons why a user wants to resolve “ Microsoft SQL Server error 2 ” issue:
- One common potential cause of the “Microsoft SQL Server, error: 2” issue is the network connectivity problem between a client and the SQL Server instance.
- Misconfigurations in the SQL Server database instance settings can lead to “SQL Server error 2”. For example – if the SQL Server service is not running or if the remote connection is not enabled.
- Another reason for error code 2 is that if SQL Server is configured to use Windows Authentication mode only, and the client is trying to attempt to connect using SQL Server Authentication, you can face Error 2.
- The SQL Server browse service helps users to locate SQL Server instances on the network. However, improper configuration or slow/no service can break a user’s access to the server and lead to the error code 2.
These are the potential causes for the “named pipes provider: could not open a connection to SQL Server [2]” issue. In the following section, we will discuss various approaches to resolve error 2 in SQL Server.
Also Read: View LDF File without SQL Server Database
Approaches to Fix Microsoft SQL Server Error 2
Now that we have read the reasons for the error 2 in SQL Server, you must have a question- how to resolve the “cannot connect to localhost SQL Server” issue? Don’t worry! We will explore the best solutions to resolve the Microsoft SQL error 2.
- Manual Method (error-prone solution)
- Enable the SQL Server Service
- Enable TCP/IP network protocol
- Provide permission to allow Remote Connection
- Professional Solution (Tried & Tested method)
Let’s begin with the manual solution to solve the “Microsoft SQL Server, error: 2” issue.
Also Read: Fix SQL Server Error 5243 without Hassles
Solution 1: Enable SQL Server Service
It is a fundamental step for fixing connectivity issues in SQL Server. Here is how users can enable the SQL Server service.
- First of all, press the “ Window + R key” to open the run dialogue box on your desktop.
- Under the run box, type “compmgmt.msc” and hit the OK button
- In the computer management screen, navigate to “service and application” and select “SQL Server configuration”.
- After that, go for the “SQL Server Service” from the preview pane.
- Once you select, you see 6 different SQL Server services available on the screen along with their states.
- In the end, the user needs to restart the services.
Solution 2: Enable TCP/IP Network Protocol
Enabling the TCP/IP network protocol for Microsoft SQL Server version 2014, 2016, or 2017 is essential to allow remote connection to fix Microsoft SQL Server error 2 .
- First, Press the “Windows + R” key to open the run dialogue box in your system.
- Type “compmgmt.msc” under the dialogue box and click “OK”.
- From the computer management wizard, go for the “service and application”>>>> “SQL Server configuration”>>> “SQL Native client 11.0 configuration (32-bit).
- Navigate to the “client protocol” section in the “SQL Native client 11.0 configuration (32-bit)” option. After this, the user will see three different protocol options– “shared memory”, “TCP/IP” and “Named pipes”.
Note: In case any of these protocol options are disabled, then please enable them first. To do this, right-click on the desired protocol and click “enable”.
- Now, try to connect to the SQL Server instance using the SQL Server Management Studio (SSMS) and check whether the error code 2 resolves or not.
Solution 3: Give Permission to Allow Remote Connection
Permitting a remote Connection is another crucial step to resolving Microsoft SQL Server error 2. The following points mention the steps to allow remote connection to the SQL Server:
- Launch and open “SQL Server Management Studio (SSMS)” in your system.
- Go to the “object explorer” section and choose “Server Name”.
- After that, right-click on it and go to the “properties” section.
- Under the “Properties” wizard, navigate to the “Connections” section and check the dialogue box corresponding to the “allow remote connection to this server” option, and click on the “OK” button for fixing the “ cannot connect to localhost SQL Server” issue.
Solution 4: Resolve Microsoft SQL Server Error 2 Via Professional Solution
In case the above-mentioned method fails to resolve the “Microsoft SQL Server, error: 2” issue, consider using the RecoveryTools SQL Database Recovery Software. It is the fast and secure way to recover corrupted database objects such as – tables, triggers, stored procedures, functions, and more. With this application, users can easily recover data from the master database file (MDF) affected by ransomware.
Additionally, the software provides two export options- “with only schema” and “schema and data”, you can choose any of them based on your needs. Moreover, the utility supports various SQL Server versions, including 2022, 2019, 2016, 2014, 2012, 2008r2, 2005, and 2000. If users don’t have SQL Server environment, it can help them open MDF file & preview the contents as well.
Step-by-Step Procedure to Fix Cannot Connect to LocalHost Effortlessly:
Step 1. Install and run the software on your desktop and click the ‘Open’ button to add the MDF file.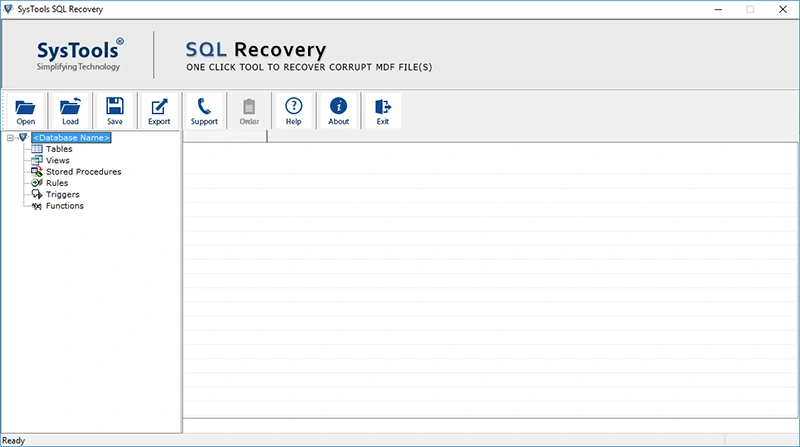
Step 2. Next, Select the ‘scan mode’ (Quick or Advanced) and choose the Server version accordingly. Also, Check the recover deleted object option, if recovery is needed. 
Step 3. Preview the repaired MDF file and click the Export option to save the data.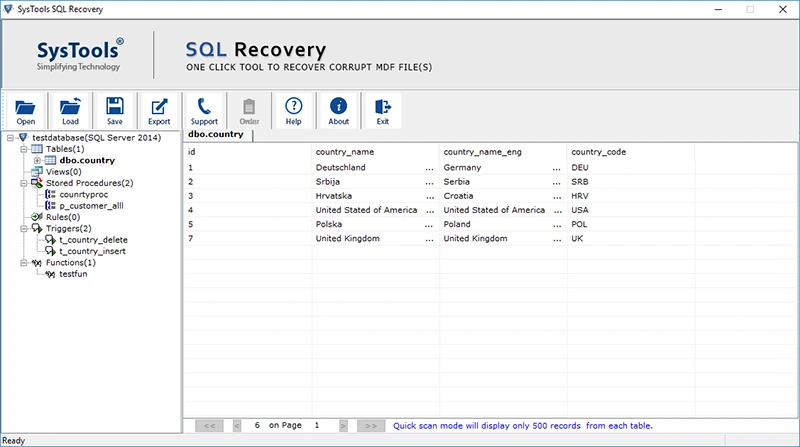
Step 4. Next, choose an ‘export option’ (CSV file format, SQL Server Database, or SQL Server Compatible Script) based on your need.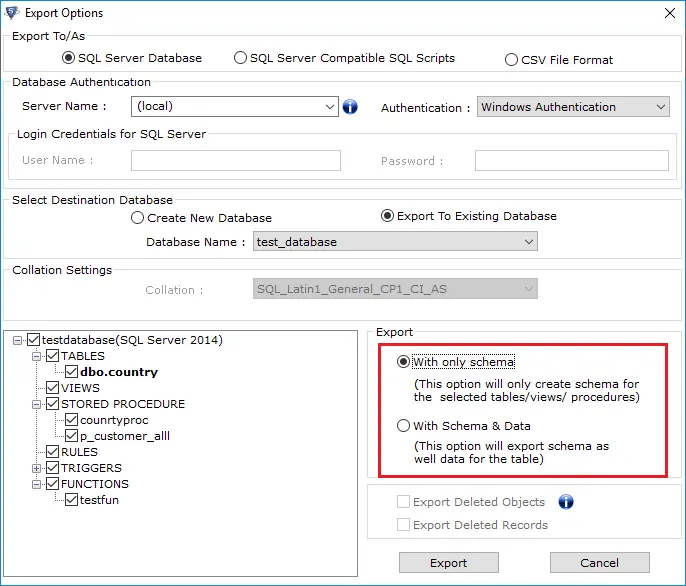
Step 5. At last, press the ‘Export or Save’ button to resolve the “ cannot connect to localhost SQL Server ” issue.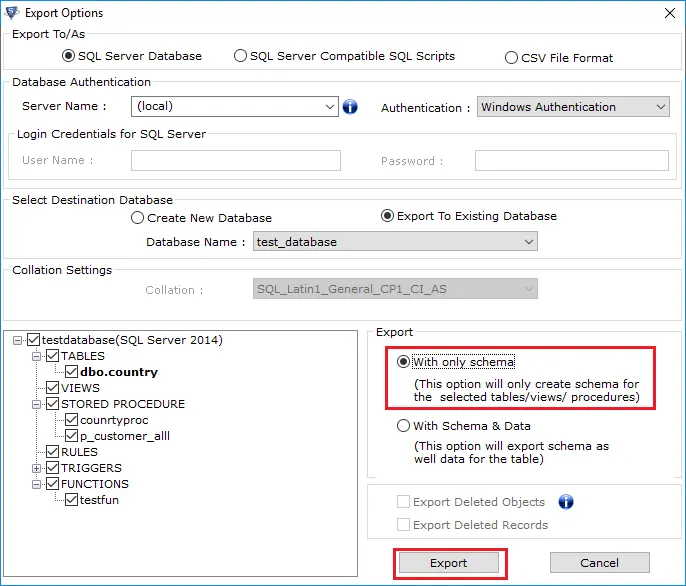
Also Read: SQL Server Error 9002 Fixed with Ease
Concluding Words
We have mentioned all the major information about the process of resolving “ Microsoft SQL Server error 2 ”. This technical guide provides a detailed roadmap for fixing the “cannot connect to localhost SQL Server” issue. By following the above-mentioned steps, the user can effortlessly resolve the “named pipes provider: could not open a connection to SQL Server [2]“ problem without any trouble. Therefore, we highly recommend you go for the professional approach to fix this issue in a hassle-free manner.
